The jockey box is available for free use by full members, subject to availability.
A deposit of $100 is required.
If the Jockey box is returned dirty, a $40 cleaning fee will be charged.
There is late penalty of $20/day ($140/week).
Missing parts will be charged at cost of new replacements (including any shipping/processing/duty charges) in addition to a late fee corresponding to the length of time the jockey box is unavailable for rental as a result of the replacement
process.
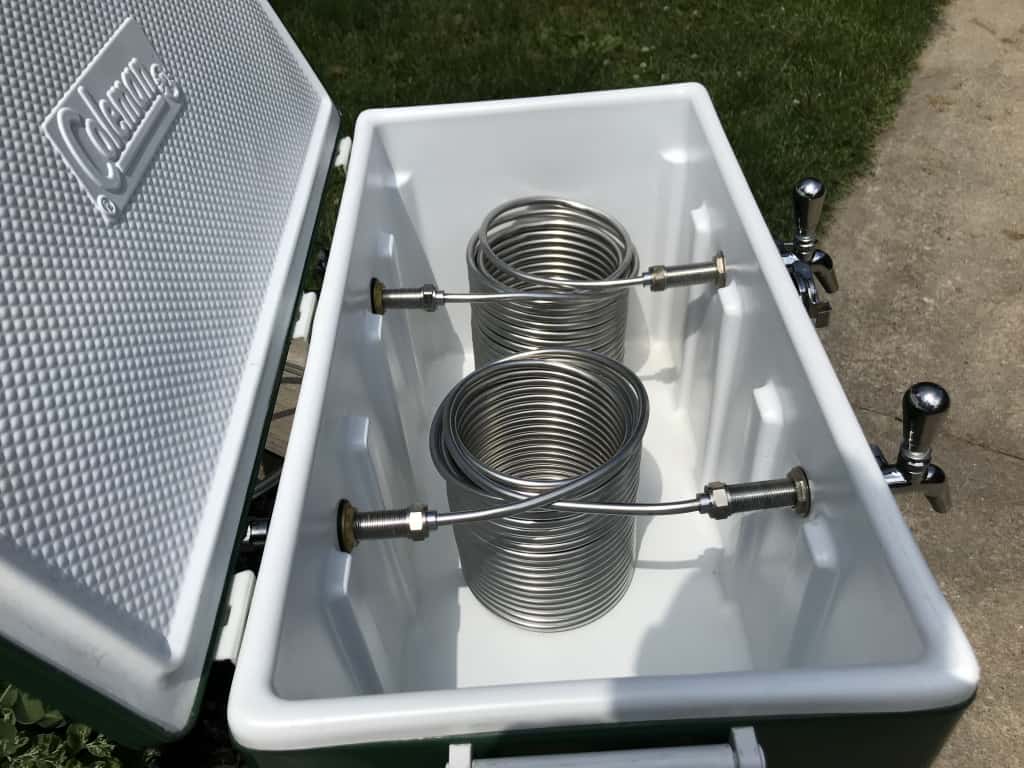
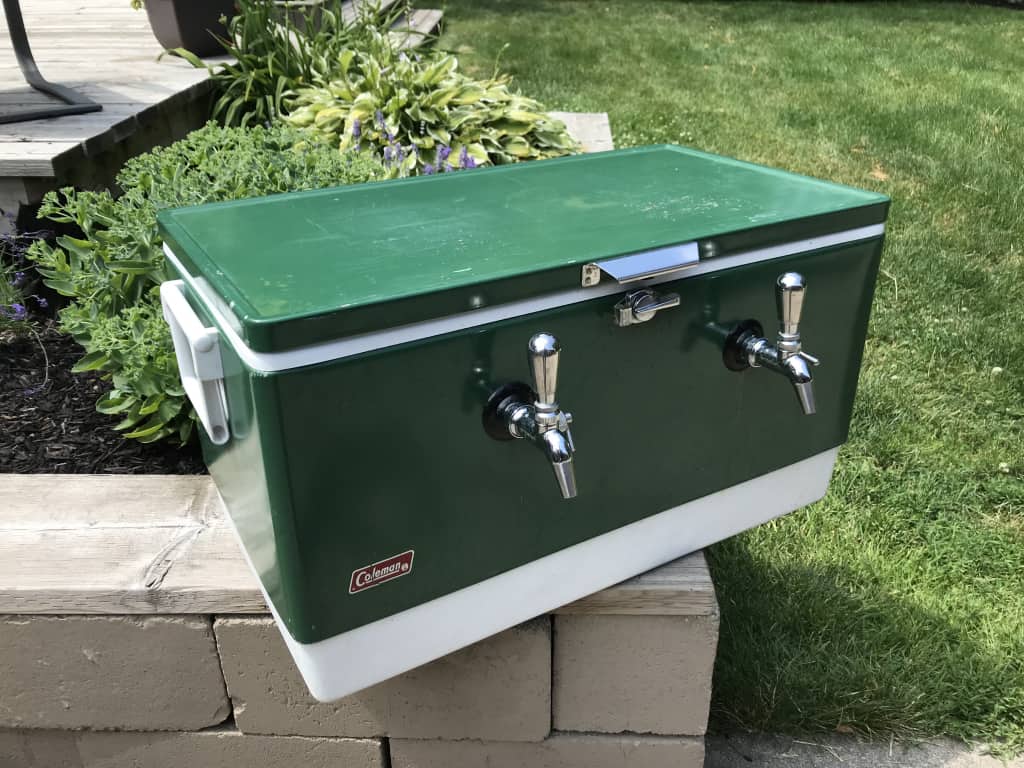
Parts list
1 Vintage Coleman cooler
2 flow control taps with stainless steel tap handles
2 70' coils with connecting shanks and shut off valves
1 Cleaning kit with pump, chemicals, and instructions
Warnings
Read the instructions fully before using!
Tap your beer and run through coils before adding any ice. Adding ice before beer could cause the lines to freeze and rupture.
Do not use anything to break up ice once it has been added to the cooler (like an a ice pick), as you are likely to damage the coils.
Note that the following items are not provided:
Kegs, or keg couplers
Beer, or Ice
CO₂ tank, regulator, or gas lines
Faucet wrench
BLC is caustic, and must be handled carefully with proper PPE (not provided). Read it’s MSDS for full details on safe handling and what to do in case of an accident.
Operation
When you pick up the jockey box the coils will be filled with a sanitizing solution. You may choose to purge this from the system with water before putting beer in the line (Alternatively you can skip to Step 2 to purge the sanitizer with
beer). You can do this with the cleaning kit provided. Simply fill the pump reservoir with water, attach the line to the rear beer shank, open the beer faucet, open the shut off valve inside the cooler, and then pump the water through the coil.
The coils hold approximately one pint worth of liquid each.
BEFORE ADDING ICE tap the keg and run beer through the coils until beer comes out of the faucet. If ice is added before beer, the storage solution may freeze, or the beer may instantly freeze upon tapping. At minimum this will delay setup
considerably, and at worse it rupture the coils.
Use cubed or crushed ice (approximately 40lbs) to fill the cooler, and then add cold water until coils are completely covered.
Temperature directly impacts the pressure needed to dispense. If the kegs are not completely chilled during your event, the beer will be foamy using your standard serving pressure. Increase the CO₂ or beer gas pressure until beer foaming
stops. The exact pressure required will depend on beer temperature and carbonation, and will likely require further adjustment over the course of your event as your kegs warm. 30psi or more is not uncommon.
As the system cools, seals may shrink which can lead to leaks. Check all fittings after the system has cooled, particularly the compression fittings behind the faucet shank. If there is a leak, simply tighten the fitting.
Adjust faucets to an appropriate serving speed. The main considerations for determining an appropriate serving speed are as follows:
The warmer your beer kegs are, the more time the beer will need to chill in the coils, which means a slower serving speed is required.
Less time between pours results in reduced coil recharge. As a result, serving speed must be reduced.
Higher carbonation beers require slower serving.
Over the course of your event, periodically drain a portion of the melt water and refill the jockey box cooler with ice. Also keep the beer kegs as cold as possible - out of direct sunlight, insulated with a keg jacket or blanket, and/or
sitting in ice if possible. Remember that as beer warms, serving pressure (CO₂ regulator adjustment) and serving speed (faucet adjustment), will be required.
Cleaning
Flush the beer out of the lines with water by attaching the cleaning kit pump to the rear shanks of the jockey box. Using the pump to force air into the coils, pump out any remaining rinse water.
Measure 1 ounce of BLC into the pump reservoir and 2 liters of water (half full). Put the lid back on the reservoir and agitate for a few seconds to mix the cleaner into the water. Pump the cleaner into the coils collecting the run off in a
container. Recirculate the run off back through the coils 2 more times, each time allowing the cleaner to stay in the coils for 5 minutes before purging again. Reminder that BLC is caustic, and must be handled carefully with proper PPE (not provided).
Flush the entire system thoroughly with water.
Remove the taps from the front of the jockey box and allow them to soak in the leftover cleaning solution for up to 10 minutes. Clean any noticeable debris away with the brush provided.
Reattach the faucets to the jockey box.
In the pump reservoir mix together 1⁄4 ounce starsan to 1 gallon of water. Pump the starsan into the coils and close the shut off valve once the coils are full. Each coil holds about a pint of liquid so run at least a quarter of the reservoir
into the lines to make sure the non sanitized water is completely out of the coil.
If the interior of the cooler gets soiled clean the outside of the stainless steel coils with a mild soap. Rinse with clean water and wipe dry. Do the same thing with the exterior of the cooler if needed.